

Jun 4th 2015
Frothing guide
| Use cold milk and a cool stainless pitcher. For making latte art a pitcher with straight walls is preferred. When getting started, use homogenized milk as 'cream top' can be a little tricky. Milk level will be about 1/4 to 1/3 in the pitcher | |
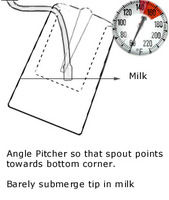 The tip should be inserted enough so that the holes are below the milk surface, but avoid submerging the steaming wand any more than needed. | |
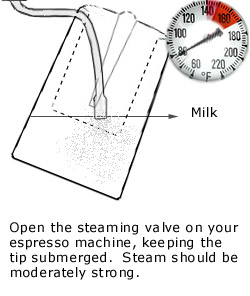 If the milk sprays messily when the valve is opened, the wand is not deep enough. The steaming should not make a loud ringing sound like you sometimes hear at the cafe. Aim for a mellow whooshing sound instead. | |
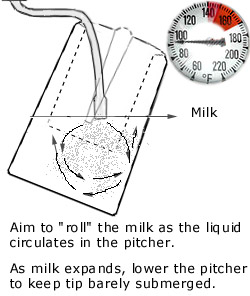 Agood 'roll' can be seen on the surface of the now foaming milk. Keep the tip consistently barely submerged in the now foaming milk. This will require you to lower the pitcher as the milk rises in the pitcher. | |
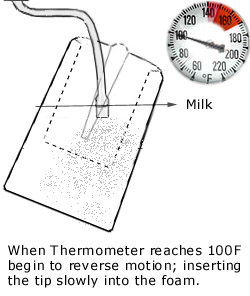 To keep the milk sweet and to get the best 'micro foam' it is best to reverse the motion at 100F. Now, instead of lowering the pitcher as the milk expands you want to slowly raise the pitcher -- submerging the tip deeper. You can submerge the tip until the wider portion of the wand is fully submerged, but not more. | |
Be sure not to over heat the milk as this produces a burnt and flat taste. Well frothed milk should be sweeter than milk when not frothed as a result of the heat converting fats to sugars. You should have tight foam with a few bubbles. Lightly tapping the pitcher vertically onto a counter top or cutting board will pop them. Finally - swirl the pitcher a few rotations to prepare the foam for your pour. |