

Posted by Sebastian on Jan 13th 2024
Gaggia Classic Group Flow Repair
Fixing a clogged solenoid valve on a Gaggia Classic - moderately difficult -- screw driver & metric allen set.
The Gaggia Classic is a great low cost espresso maker. The shot quality is surprisingly good and it has some unique features that make it very reliable.
One thing we see a lot in the repair shop is a Gaggia with very low or no group flow. The potential causes are:
- Clogged solenoid valve (almost always the issue)
- Failed Pump
- Failed solenoid coil
- Clogged group dispersion and/or shower
- Failed switch
While this is almost always a clogged solenoid valve, its best practice to check other possibilities.
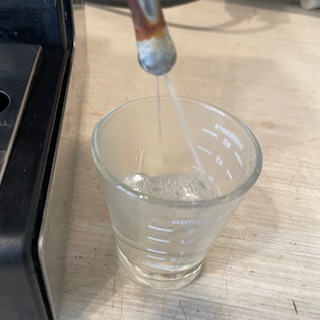
To troubleshoot the pump, turn the steam valve to open position and turn on the brew button. If pump is running and water is dispensing from the steam wand, the pump is operational as in the photo below.
A failed switch is easy to spot because there will not be pump sound - generally nothing will happen when you flip the switch.
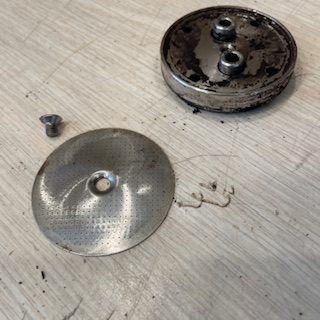
To check the group screen and dispersion disk, remove the screen (crescent screwdriver). Use 5mm allen wrench to remove disk (2 allen screws). Look for caked up coffee goo and solids that may be preventing flow & try brew switch with items removed. If the water flows from the single hole in the group, then you simply need to clean the disk and screen thoroughly and replace.
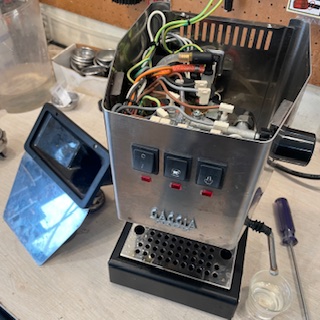
If the pump and group are fine, the next step is to remove the top panel using a crescent screwdriver. (UNPLUG machine) Loosen the screws at the back of the panel and lift up and back. Some models have ground wires attached to the panel - just pull them off.

On rare occasions, the solenoid coil may be the issue. The coil uses electricity to create magnetic energy. A simple test of a coil is to energize the coil with appropriate power with a metal item in the solenoid cavity - this will cause the metal item to stick to the walls of the cavity. As this is a rare occurrence, you can skip this step if you are not entirely comfortable with electronics as an electrical shock will be highly unpleasant.
Assuming the mechanical part of the solenoid is blocked, the next step is to remove the boiler assembly, detach the boiler from base, remove and clear the solenoid valve & remove all mineral from the boiler and tubing. This last step is important to avoid recurrence of the issue.
Leave electrical connections on the boiler in place while being careful to handle gently to avoid damaging them. Removing the entire boiler assembly is done by removing 4 x 4mm allen screws found on four corners of the group where you inert your portafiler (first picture in grid below). Remove steam wand (older models are threaded / newer are retained by clip). Remove (by pulling outward) plastic steam knob. Carefully pull the assembly up so that the boiler and solenoid valve may be accessed.
Find the solenoid valve, it is attached to the boiler base - remove silicon tube and 13mm nut - then pull off the coil.
Detach the boiler from base using 5mm allen wrench on 4 screws - expect some water to leak as you remove boiler. There may be a pile of mineral scale - remove hard scale on surfaces of boiler and base using a wire brush. It is advised to use a new o-ring when reattaching the boiler as the old one may leak.
The solenoid valve is the likely point of obstruction. Use canned air or blow through the 2 holes (holes with o-rings) to see if either are blocked. Use a fine pick or some descaling acid to remove blockage. This may be tedious as the sediment or scale may be deeply lodged. When the 2 holes are open, clean the plunger and rebuild. Reattach to base.
Clean the group screen and dispersion screen and replace.
Replace the boiler in the frame with the allen screws - make sure plastic piece on the steam valve is attached and then replace the steam wand. Put cold back on solenoid stem, retain with 13mm nut - attach silicon waste tube with spring loaded clamp. Replace the top body panel (ground wires).
Good luck. Avoid handling when hot and always unplug before working on internal parts of machine.
4 allen screws (4mm)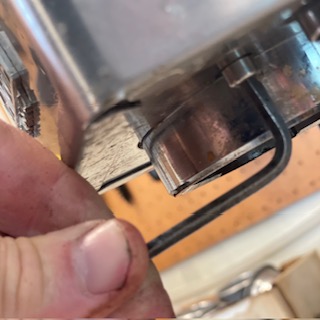 | pull off knob | remove steam wand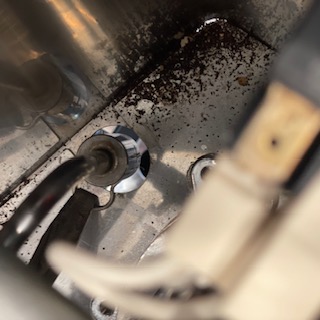 |
boiler may be pulled up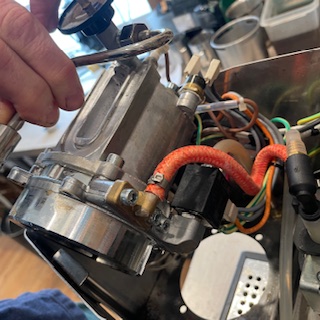 | Remove coil and silicon tube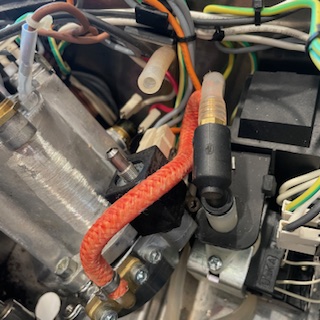 | 4mm allen remove 2 screws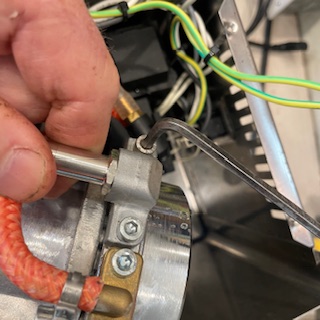 |
removed valve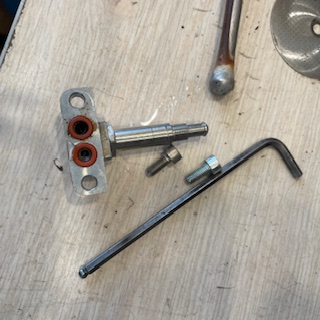 | detach stem from base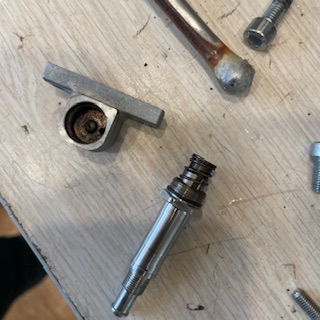 | remove boiler - base 5mm allens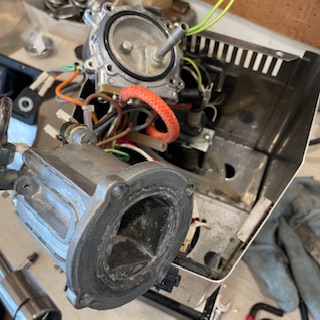 |
remove mineral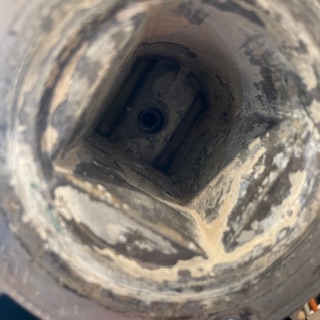 | clean valve | clean & test both holes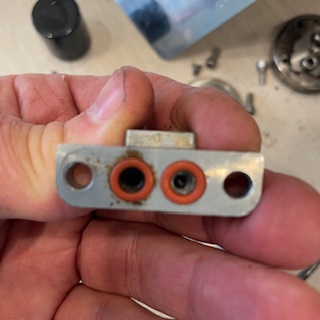 |
cleaned valve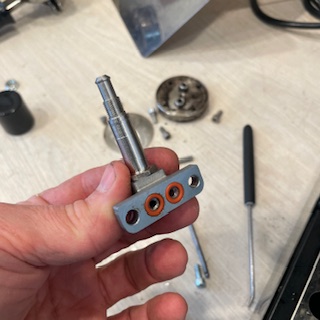 | cleaned group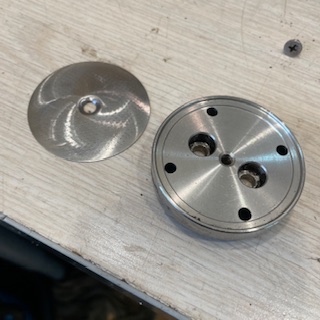 | rebuild and test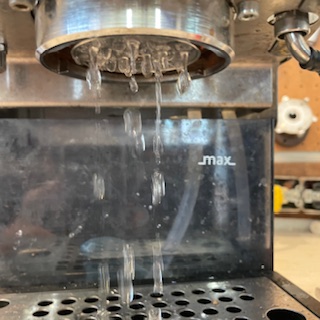 |